
Purchasing artwork can be a process - maybe you were waiting on a completed renovation to buy the right piece, or maybe you've researched countless artists and styles before choosing the right one. Or maybe you knew you wanted a painting right away, and made that investment immediately. But either way, when that piece has finally arrived... it needs to be hung. The way artwork hangs is not only significant for aesthetics, but for the safety of the work, too. To get ready and finally hang the artwork you love in your space, read how in just three simple steps.
1. Gather your tools.
Before hanging your artwork, you'll want to make sure you have the appropriate supplies to hang it securely on the wall. No matter what, you'll want a pencil, measuring tape, and a level, and other tools depending on the size and weight of the piece.
Most small, mid, and even large-sized paintings can hang securely on a wall with a single nail, and we recommend using a hanger as well. You will also need a hammer.
For heavier artwork, if you happen to be hanging it over a wood stud, then a nail and hanger should suffice. Studs are located approximately every 16" on a wall, and you can find these by tapping the wall to feel for a more dense surface. If you have metal studs, or due to other furnishings are hanging the piece on plain drywall, though, you may want to use an anchor and screw, and you'll need a screw gun.

2. Measure it out.
Once you have gathered the appropriate materials, you'll need to measure where the artwork will hang. A good rule of thumb is that the center of the piece should hang at eye level, which is considered to be anywhere from 57" to 62".
To start, find where you want the horizontal center point of your painting to hang on the wall. Mark it lightly in pencil. From that point, measure up to anywhere between 57" to 62" (depending on the surrounding area and wall height), and make a second mark in light pencil. Note that when hanging artwork above couches or beds, the bottom edge of the painting should hang roughly 8"-10" above the top of the furniture. You may find that "eye level" height will not work in these situations and need to adjust as necessary.
Next up: Math! Measure the number of inches from the top edge of the piece to the wire when it is at its peak (pull it up in the middle). Then, divide the height of the painting in half. Find the difference between these two numbers, and then measure that amount above your "eye level" pencil mark on the wall. Mark it in pencil again, and that is where the bottom of the hanger should rest, or where the anchor and screw should be drilled in.
Here's an example with real numbers: Let's say the center of a 40"x40" painting should hang at 60". It's 5" between the peaked wire and top of the painting, and half of the height of the piece is 20". The difference between 20" and 5" is 15". Add 60" and 15" for a total of 75". The bottom of your hanger should be placed at 75" on the wall (put another way, an additional 15" above the eye level mark you made on the wall).

Note that some artwork is not wired! If your painting has different hanging hardware, like wall buddies for example (below), you can follow a similar process for hanging. You'll want to use the edges of the piece in addition to the center as a reference, and measure to the bottom of the wall buddy rather than the peak of the wire. You'll need to measure and mark your points twice. Very often, unique hanging hardware will arrive with instructions.

3. Hang it up.
If you are using a hanger and a nail, hold your hanger with the nail through it so that the bottom of the hanger rests over the top pencil mark on your wall. Hammer it in firmly.

If you are using an anchor and screw, use your screw gun to drill the anchor into the wall over the top pencil mark. Then use the screw gun to place the screw inside the anchor until it's almost flush. This process will open up the anchor inside the wall, creating a stronger foundation for the painting to hang without damaging anything.
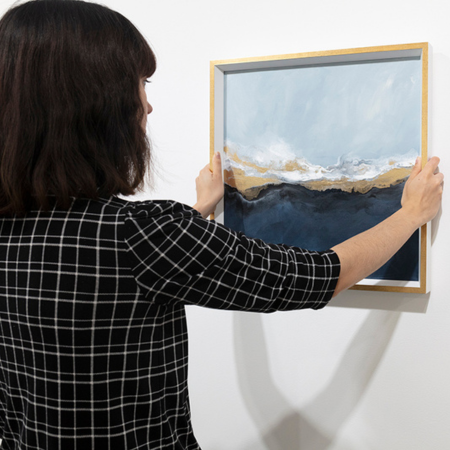
Pull down lightly on the nail or screw to ensure that it is secure. Then, pick up your artwork, hold the wire with an open palm, and lightly drag it down over the hanger, nail, or screw. Adjust it to be level - you can eyeball this, or use a level to be extra certain that it's straight.

You will definitely want to use a level to test that the work is straight if the painting had wall buddies or other hardware in place of a wire. Even a slight difference can be noticeable!
Now you can fully enjoy your artwork! For questions about hanging a specific piece you're looking at in the Sorelle collection, contact us! We can provide more information about the best way to hang each individual piece.
For more information on how to take the best care of your artwork, read our 5 Simple Tips for How to Care for Your Artwork on the blog, and find other Art Resources here.

0 comments
Post a comment